Guide for Unity
Using our Unity SDK Plugin, you can implement the haptic into your content made with Unity.
- Import SDK Plugin
- Link the Haptic App
- Add Prefab for Initialization
Requirements
Development Environment
- Windows 10/11 (x64), macOS (Apple Silicon)
- Unity 2022 and later
- bHaptics Player installed
- Deployed haptic application corresponding to your game
- App ID and API Key of the haptic app
About haptic application
You can create and manage haptic apps in Developer Portal, a web-based tool.
If you're unfamiliar with haptic apps or haven't created one yet, please follow the Portal guide before proceeding.
Before linking a haptic app to your game project, make sure the haptic app meets the following requirements:
- At least one haptic event must be created.
- API Key must be generated.
- There is no API Key by default. To generate one, go to the "API Key" tab and click "New" button.
- Haptic app must be deployed
- If you see "Deploy Now" button in the upper right corner, click it to deploy your haptic app. Otherwise, if you can see "Up to date", it means that the latest haptic app has already been deployed.
Also, link process requires App ID and API Key. Go to the "Settings" tab, and check the App ID and API Key.
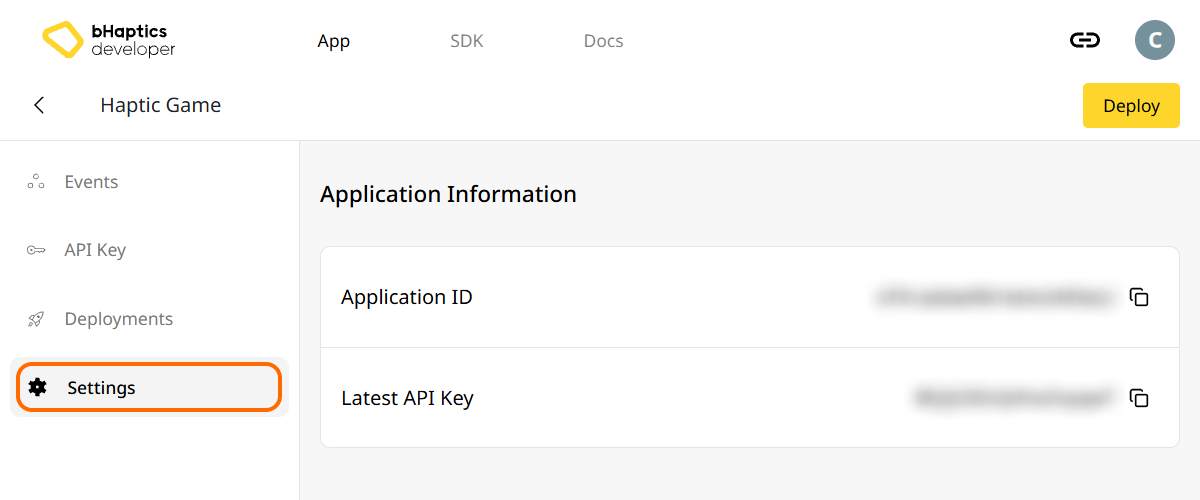
If you need support for an earlier Unity version than 2022, contact us at support@bhaptics.com.
Runtime Environment
The following OS and devices are supported as the runtime environment.
- Windows 10/11 (x64), macOS (Apple Silicon)
- The bHaptics Player must be installed on the PC.
- Android (VR headsets only)
- Supported headsets: Meta Quest 2/3/3S/Pro, Pico 4/4 Pro/4 Ultra, HTC VIVE Focus 3/Focus Vision/XR Elite
- The bHaptics VR Player must be installed on the headset.
- iOS(iPadOS) 15+, visionOS
- PS5
Using bHaptics haptic devices on a standalone VR headset without the bHaptics VR Player installed on the headset is deprecated. Install the bHaptics VR Player on the headset to use haptic devices.
If you are developing for Android, macOS, iOS, or visionOS, additional setup is needed to use the bHaptics SDK. Please check the following sections.
- For Android, please check the Update Android Manifest section.
- For macOS, please check the macOS Network Entitlement section.
- For iOS & visionOS, the bHaptics Player app doesn't manage device connections — each app scans for and connects to bHaptics devices directly over Bluetooth. See the iOS/visionOS Connection Guide for setup steps.
Import SDK Plugin
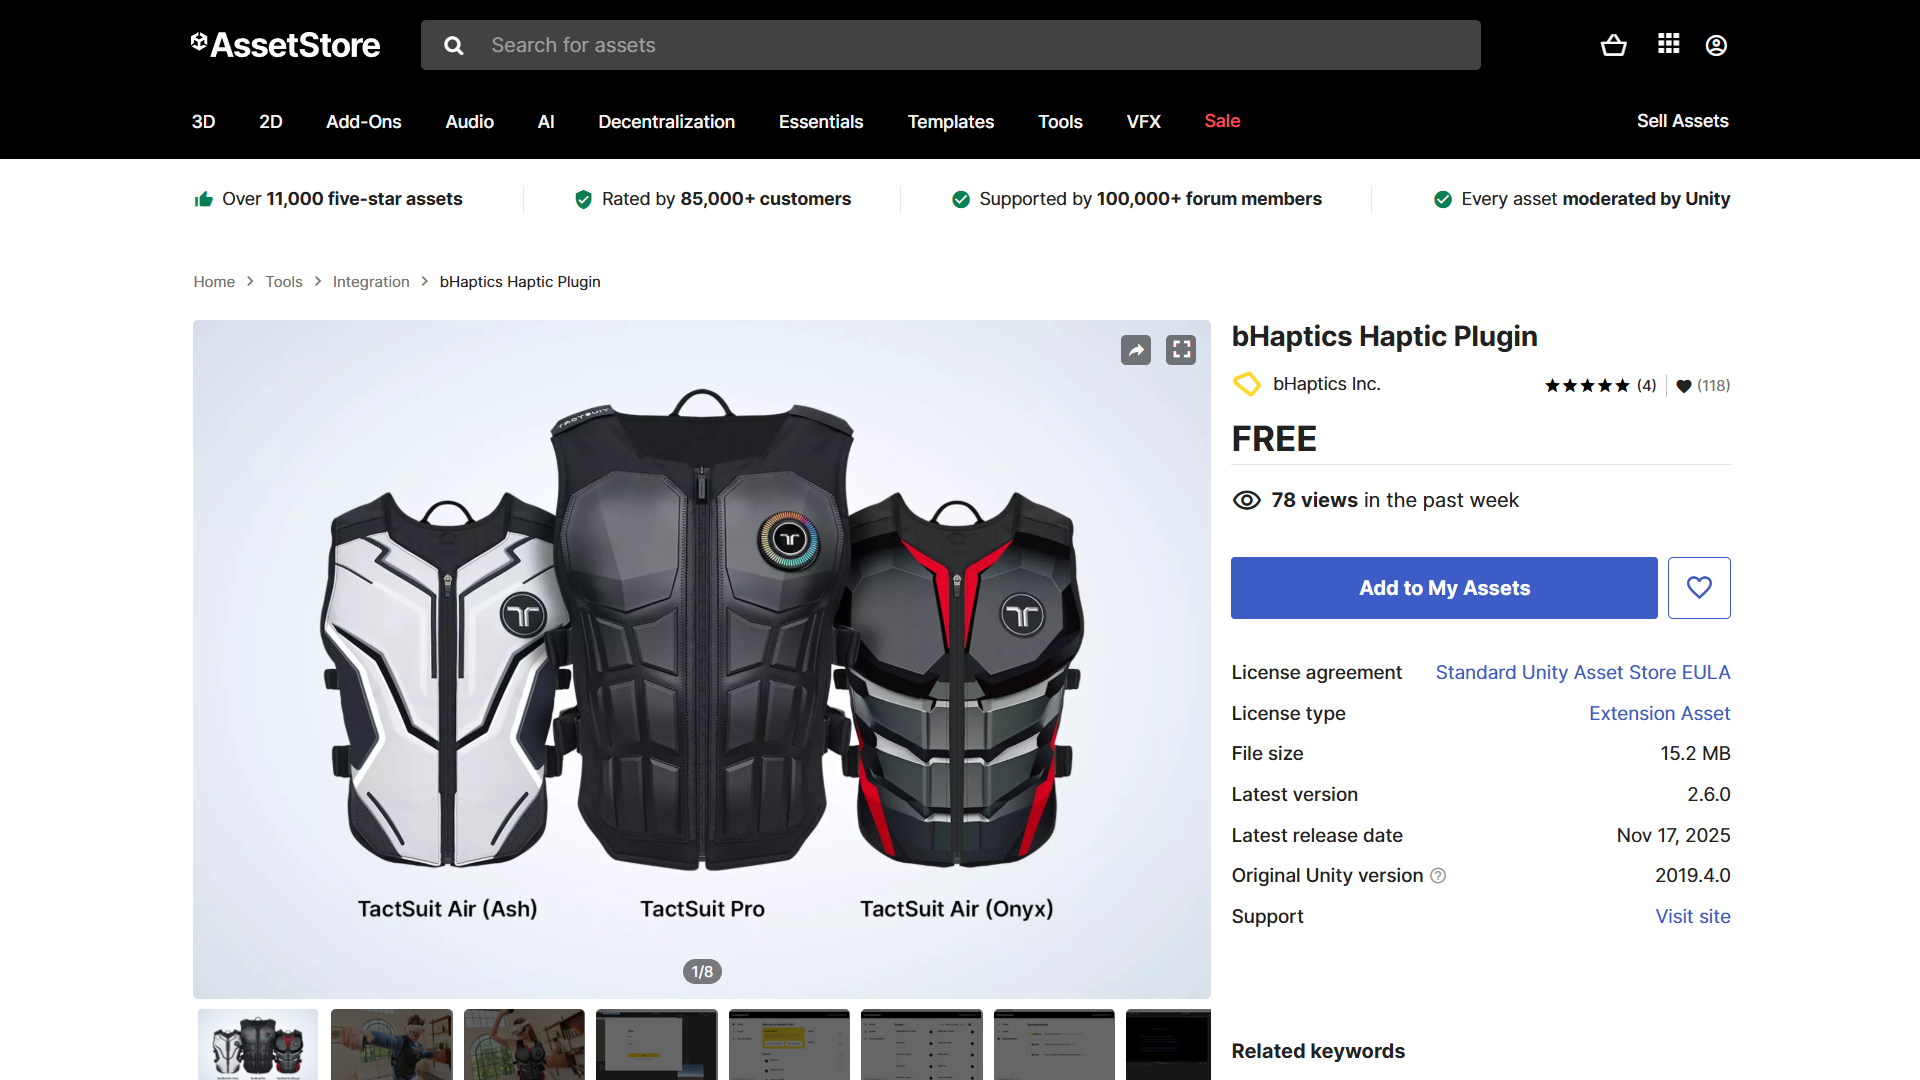
Get bHaptics Haptic Plugin in Unity Asset Store, and import the package into your Unity project.
For more information about importing the Unity package to your Unity project, follow the official Unity documentation.
If you were using a previous version of the Unity package, delete these legacy Android library files after updating — delete each .aar together with its matching .meta file:
bhaptics_ble.aar/bhaptics_ble.aar.metabhaptics_commons.aar/bhaptics_commons.aar.metabhaptics_core.aar/bhaptics_core.aar.meta
They are no longer used by the current package and can cause Android build errors from duplicated libraries.
Link the Haptic App
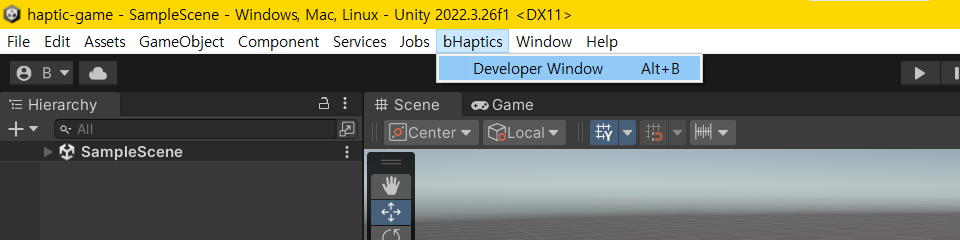
- In the toolbar, select "bHaptics" → "Developer Window".
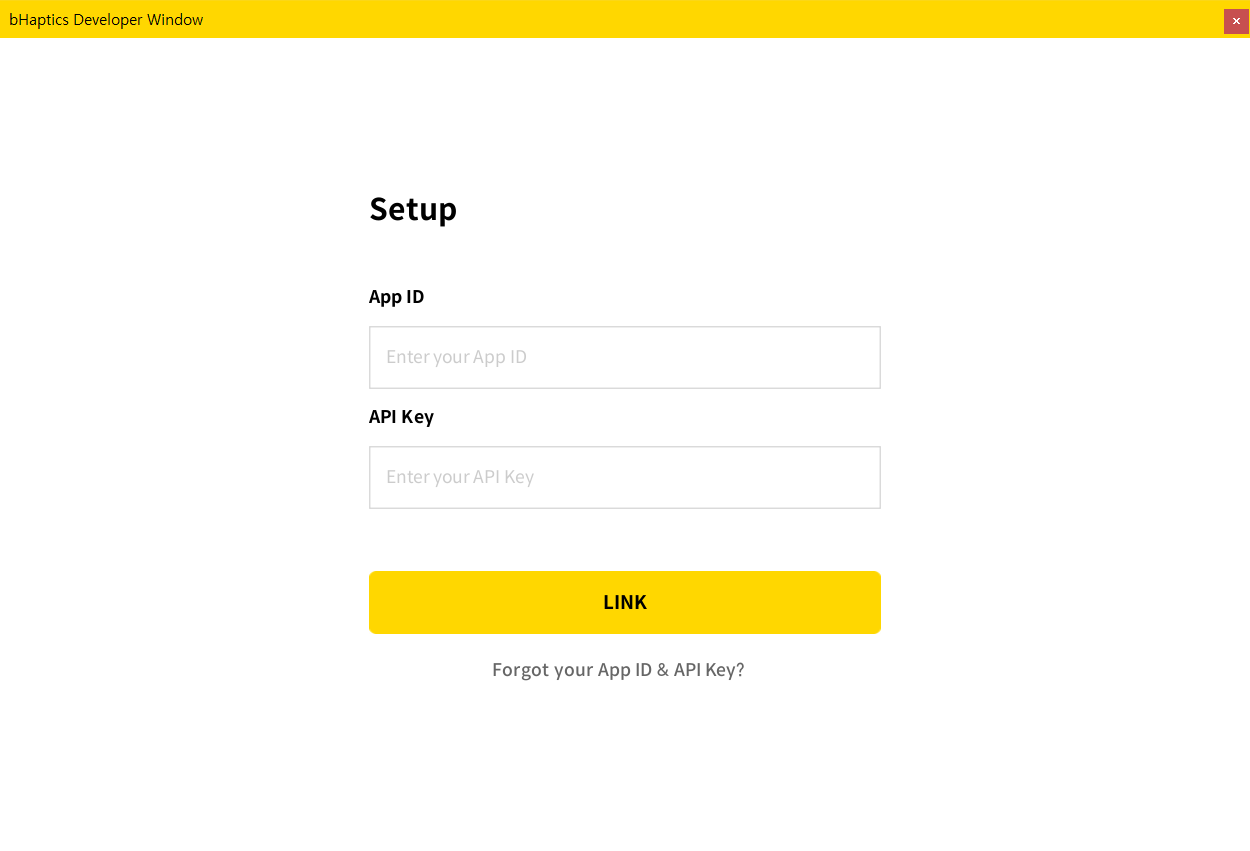
- Enter your App ID and API Key from Portal, then click "LINK" button.
 note
noteYou can press "Forgot your App ID & API Key?" to visit Portal and retrieve the information.
- After successful certification, the application will appear on bHaptics Developer Window.
Browse App in bHaptics Developer Window
-46c155847dab4bc7be0254c2014b9771.png)
There are multiple tabs you can explore.
- Home: View the sample guide, and information about your application.
- Events: Browse and play the latest events you deployed from bHaptics developer portal.
- Documentation: Browse the documents about the SDK(including this site!)
- Latest Deployed Version: Check the version or refresh.
note
Ensure the version in the portal matches the version in the editor; if not, press refresh icon.
- Unlink: Disconnect between the game and the haptic app.
Add Prefab for Initialization
There is a prefab named "[bhaptics]" for initializing the haptic environment. It should be instantiated before using haptic-related functions. We highly recommend to place it at the first scene.
-efc4342b17095102d94052b4fc690f40.png)
- Go to your first scene.
- In the Project Window, Go to "Assets" → "Bhaptics" → "SDK2" → "Prefabs".
- Add "[bhaptics]" prefab into your scene.
The component in this prefab uses the common Unity Singleton pattern with DontDestroyOnLoad. You only need to place it in the first scene, but it is okay to place multiple places since duplicates are automatically destroyed.
Update Android Manifest
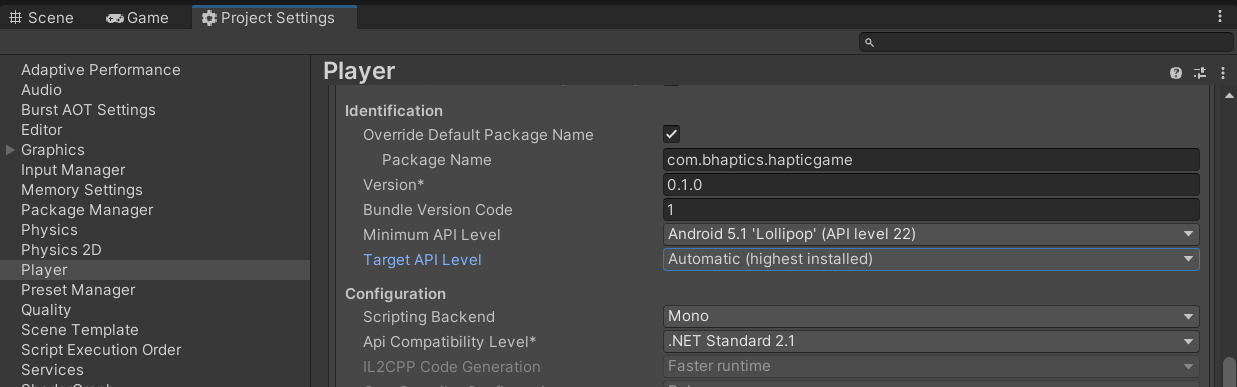
Updating your AndroidManifest.xml is required when you build your game for standalone headsets (Android). Since Android restricts package visibility from Target API Level 30, your game cannot detect the bHaptics VR Player (the com.bhaptics.player package) without the manifest entry below.
To check the project's Android target API level, Go to Project Settings → Player → Android settings(Android icon) → Other Settings → Identification → Target API Level. Refer the Unity manual for more information.
- Enable Android app manifest override. Go to Project Settings → Player → Android settings(Android icon) → Publishing Settings → Build → Custom Main Manifest. Then enable it if it's disabled. The directory of the manifest file is shown below.
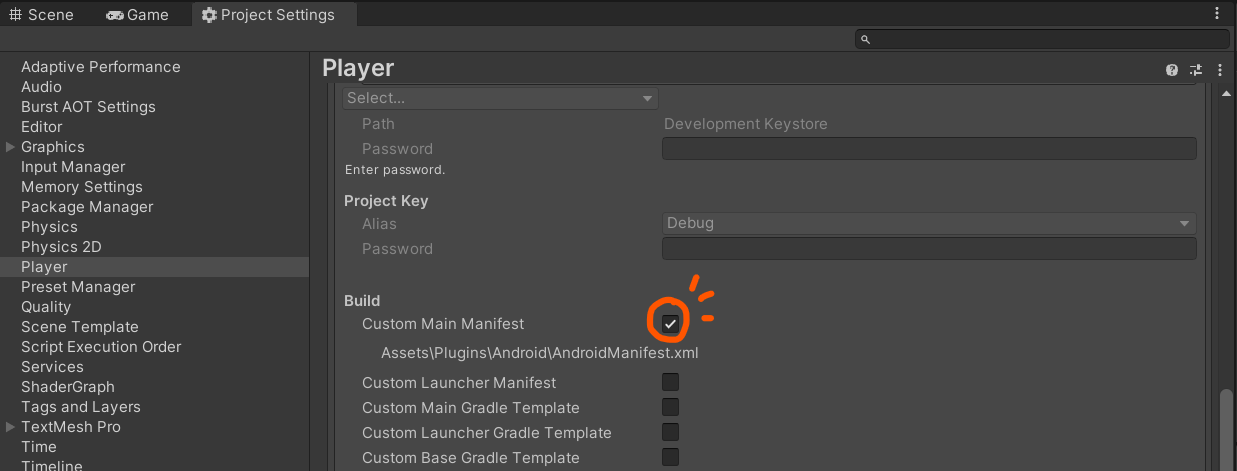
- Open your
AndroidManifest.xmlfile, which is usually located in theAssets/Plugins/Android/directory. - Add queries element to the manifest file.
<queries><package android:name="com.bhaptics.player" /></queries>
After the process is complete, the manifest file should look like this.
<?xml version="1.0" encoding="utf-8"?>
<manifest
xmlns:android="http://schemas.android.com/apk/res/android"
package="com.unity3d.player"
xmlns:tools="http://schemas.android.com/tools">
<application>
<activity android:name="com.unity3d.player.UnityPlayerActivity"
android:theme="@style/UnityThemeSelector">
<intent-filter>
<action android:name="android.intent.action.MAIN" />
<category android:name="android.intent.category.LAUNCHER" />
</intent-filter>
<meta-data android:name="unityplayer.UnityActivity" android:value="true" />
</activity>
</application>
<queries>
    <package android:name="com.bhaptics.player" />
</queries>
</manifest>
For more information, please refer to the following resources.
If you've activated Minify option, you should add exceptions to the Custom Proguard file (proguard-user.txt).
macOS Network Entitlement
On macOS 15 (Sequoia) and later, a packaged app runs inside the App Sandbox. The sandbox blocks all network access(including connections to localhost) unless the app declares the network client entitlement. Because the SDK talks to bHaptics Player over a local connection, a packaged macOS build without this entitlement cannot connect to the Player (you may see it fail with a sandbox deny network error).
When you package your app for macOS, add com.apple.security.network.client entitlement. This is configured by the app developer and is not part of the SDK.
Further Reading
You're now ready to use the bHaptics haptic feature! Visit our Unity References page to play haptics in your game.
If you want to feel haptics right now, we provide a sample scene to explore the haptic events you can playtest. Go to "Assets" → "Bhaptics" → "SDK2" → "Examples" → "Scenes", and open "PlayParamSample" scene. You can play all haptic events with adjusting related parameters.