App and Event
In this page, we'll create our first application in the Portal. Then, we'll create the event, import a pattern into event.
Developer Portal

First, let's move on to our bHaptics Developer Portal page.
If you see a log-in page instead, please sign in to your account, or sign up if you don't have one.
Create the App
In Portal, you can make applications(apps). Each app is corresponding for each game. Let's make new one.
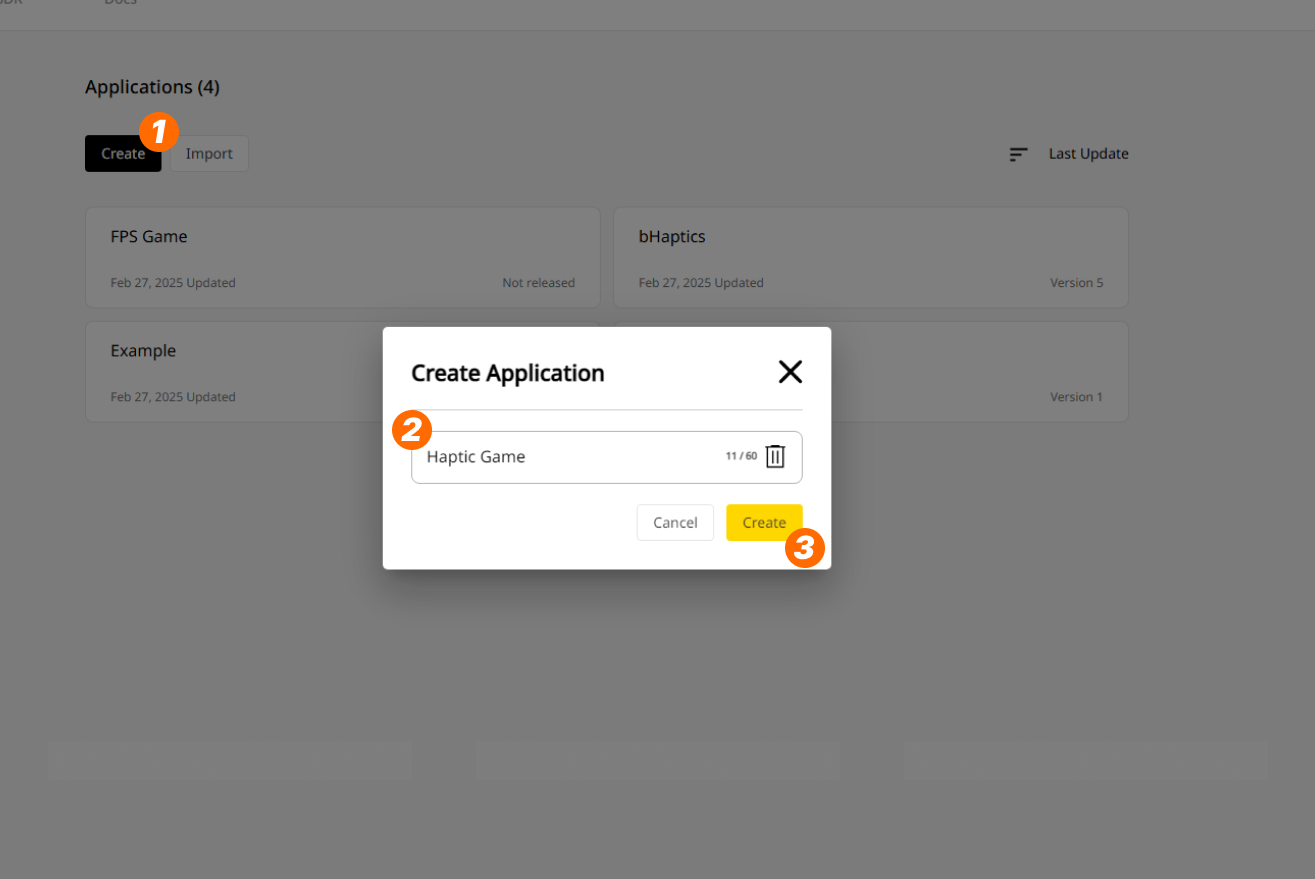
- Press "Create." Then a pop-up window will appear.
- Name the app. Let's name it "Haptic Game" for now. You can always change it later.
- Press "Create." Your app will then be created.
Once you've created the app, the app page will appear.
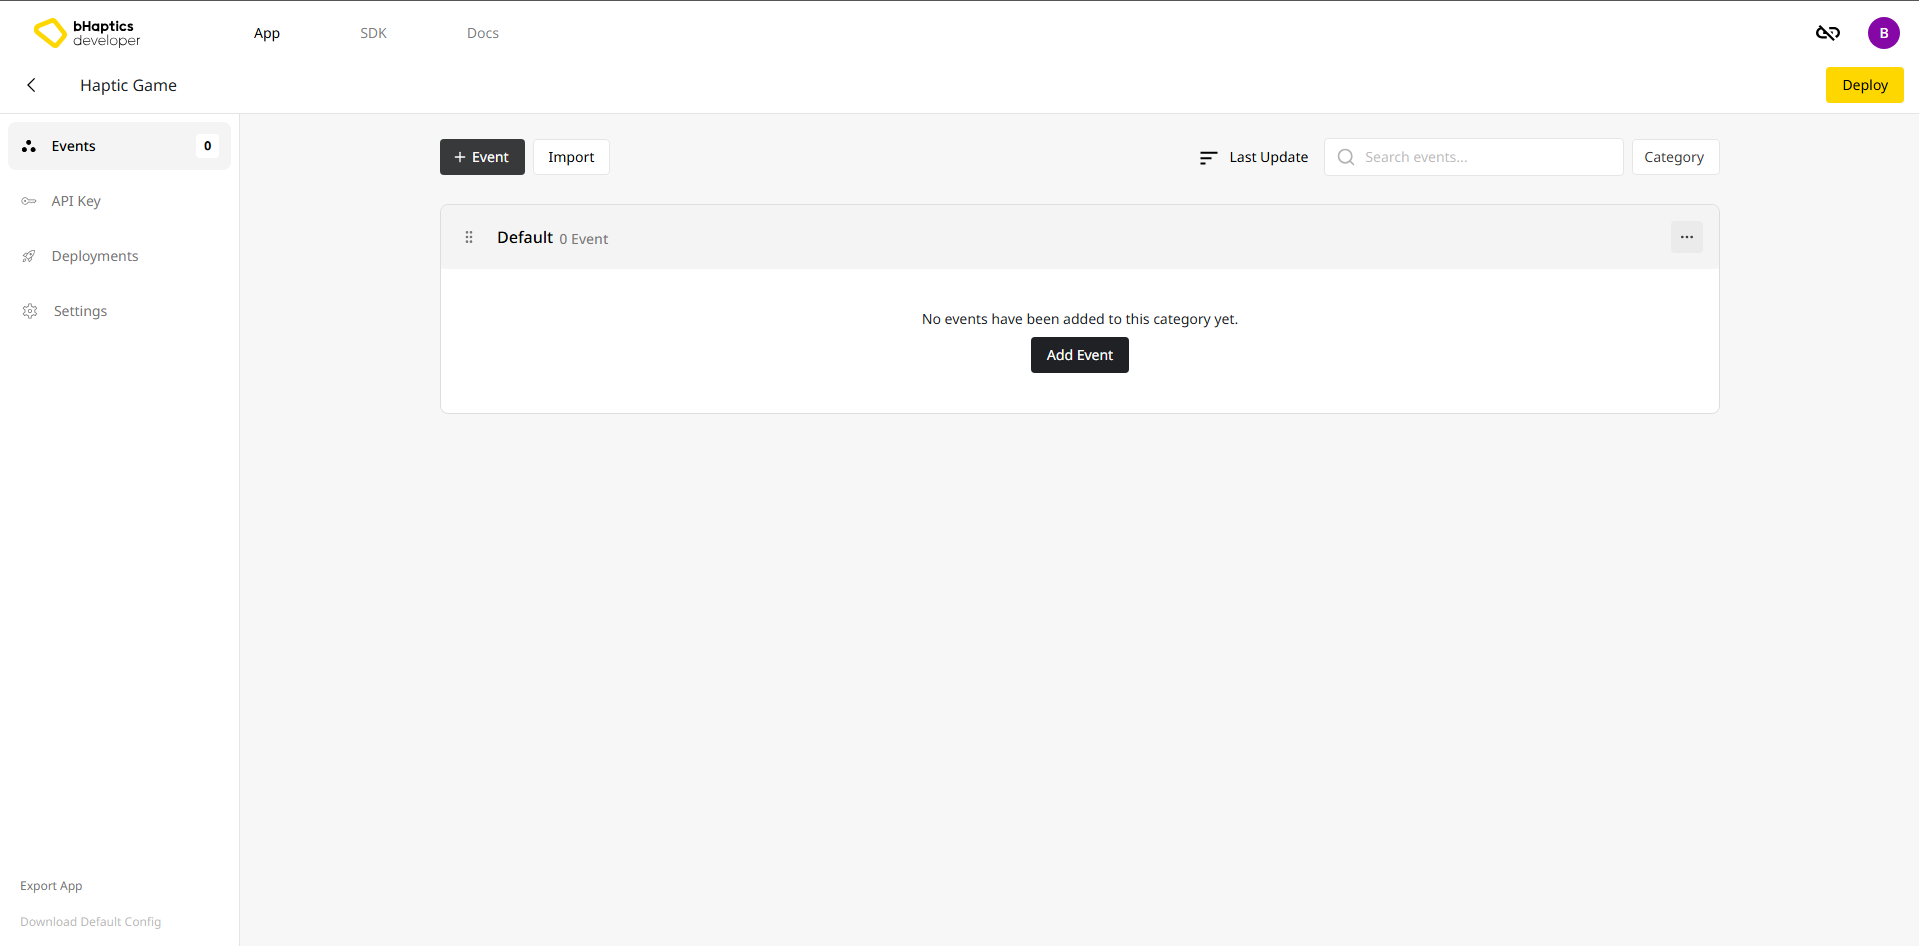
On the left, there are several tabs available for navigation. Currently, you can see that the Events tab is activated by default.
- Events: Add, Delete, Manage events.
- API Key: Browse the history of API Keys used to plug into the game.
- Deployments: Browse the deployment history.
- Settings: Review necessary information for linking with the game and manage collaborators.
For now, let's focus on the Events tab. We'll explore the other tabs later.
You can also see that there are already some empty categories. We will create some events in them. Now let's understand what events are and how to create them.
You can rename the app by clicking the title at the top.

What is an Event?
In game development, an "Event" refers to specific actions or situations within a game, such as player input (pressing a button), in-game interactions (picking up an item), scripted sequences (cutscenes), or system events (an enemy being defeated).
In the Portal, you will define corresponding events for every action in your game that produces haptic feedback. For example, let's consider a shooting game in virtual reality (VR).
- Basic Movement
- Move, Jump, Dash, Climb
- Gun
- Take out from holster, Store to holster
- Shoot
- Eject magazine, Insert new magazine, Reload
- Getting hit by a bullet
- UI interaction
- Press button, Drag the slider handle
Haptic app should contain at least one haptic event.
Creating Haptic Events
Let's create an event for "dash", a commonly used action in both PC and VR games.
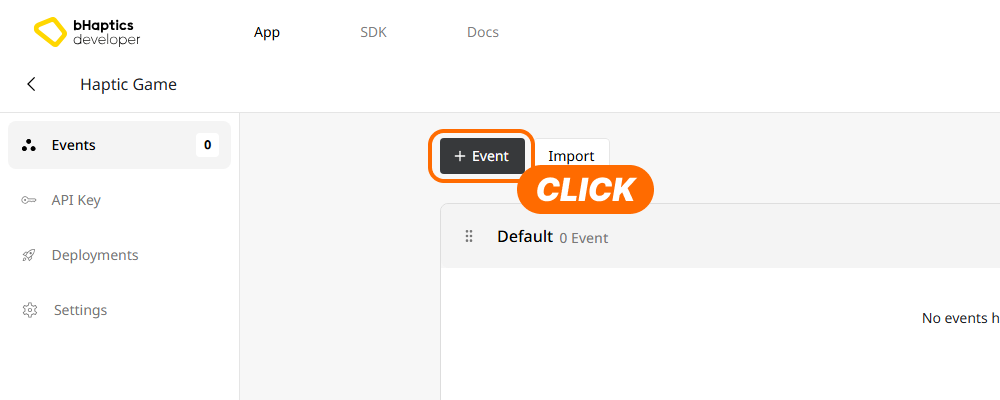
First, click the "+ Event" button, and the Event-Pattern mapper window will open.
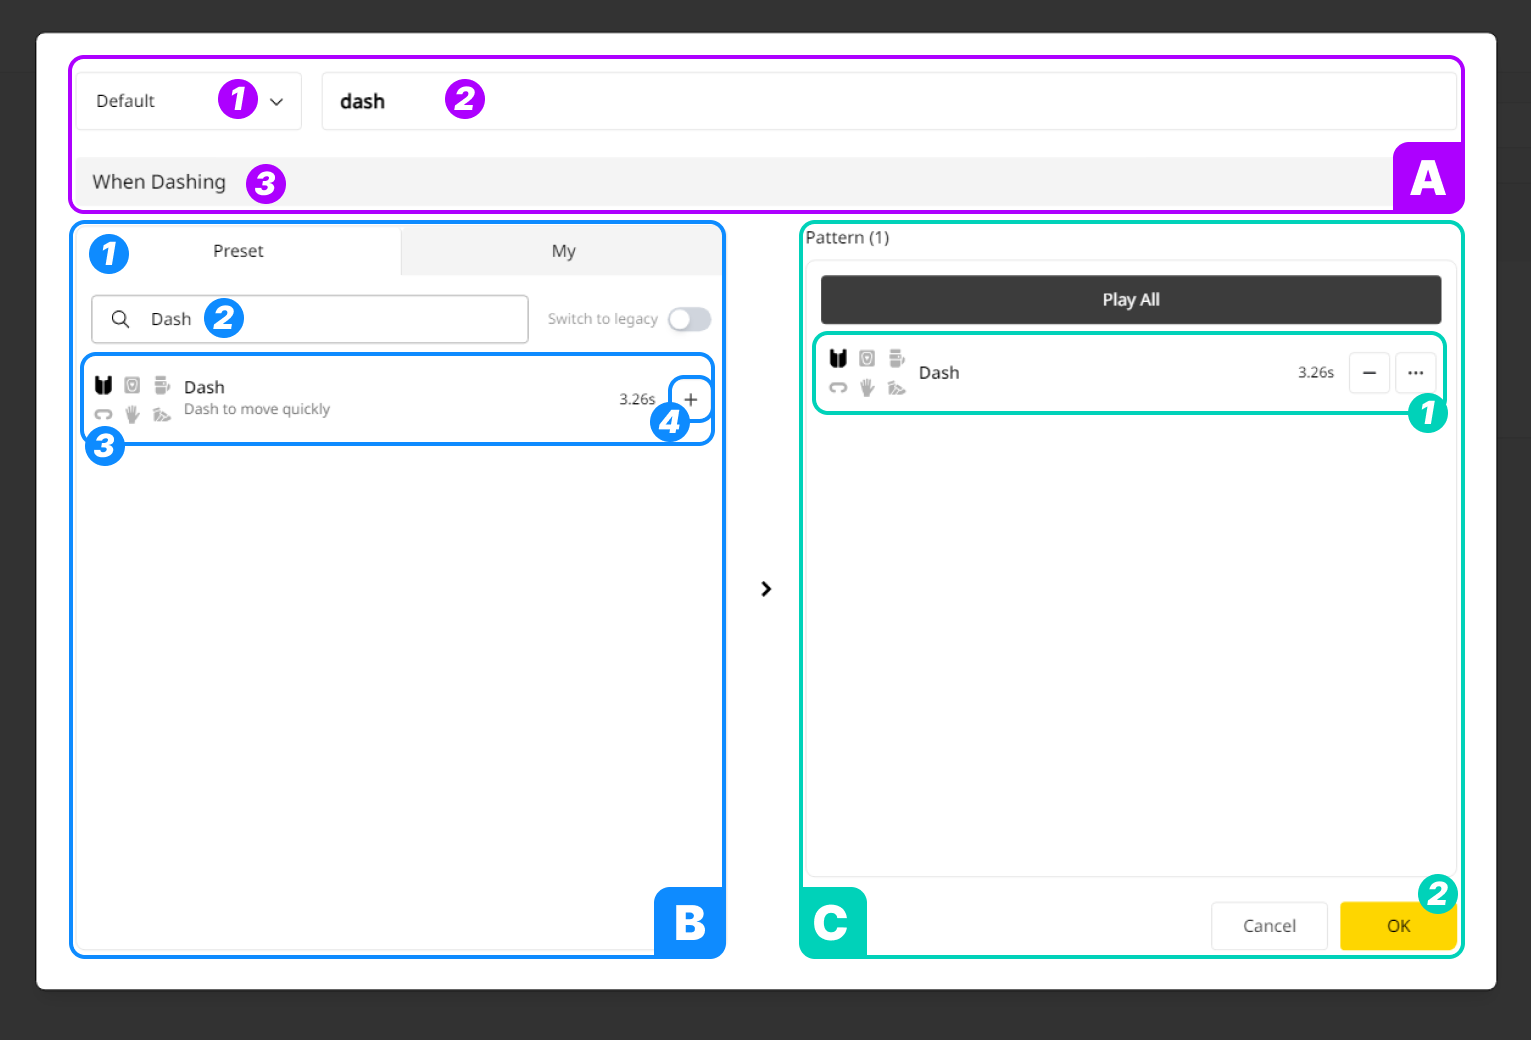
- (A) At the top, you can set the basic info.
- Select the category. Choose
Default. - Name the event. Let's name it
dash. - Optionally, you can write a description about the event.
- Select the category. Choose
- (B) On the left, you can browse and import the pattern.
- There is a "Preset" tab where you can browse the pre-made patterns. We'll look the "My" tab later.
- You can import any patterns you want. We've already made the pattern named
Dashwhich work nicely with dashing in the game. First, let's search forDash. Then the result will appear below. - You can preview the pattern by clicking the item.
- Press the '+' icon. It'll import the pattern.
noteYou can add more than one pattern to a single event.
- (C) On the right, You can manage added patterns and save the event.
- You'll notice that
Dashwas added to the list on the right when you import it. - Press "OK" to save the event.
- You'll notice that

We just created our first event called dash. You probably noticed that the color of name is green, and the "Save" button at the bottom becomes black. This indicates that there are unsaved changes in the app. Press the "Save" button to save the app.
Naming an event
An event's name can only contain lowercase alphabets, numbers, dashes(-), and underscores(_).
We recommend using underscores(_) to replace spaces.
Edit the event
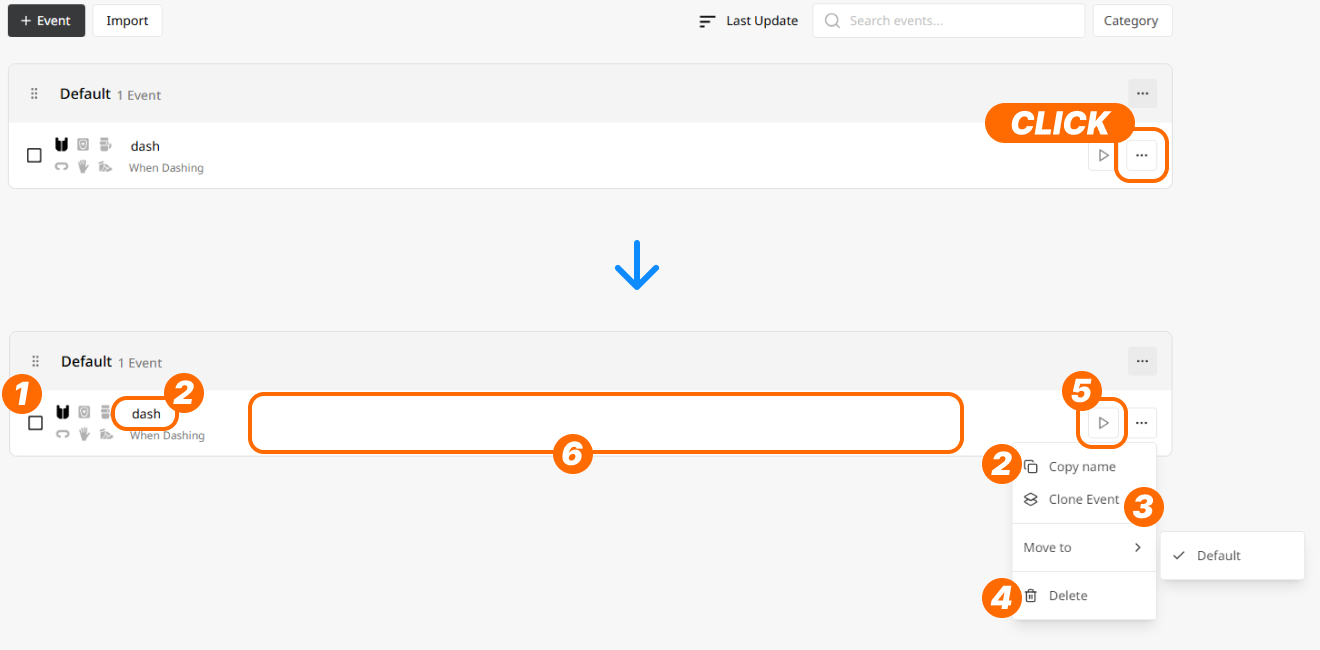
When you hover over an event item, you can see various management functions for event:
- Checkbox: Select events to delete them all at once.
- Name: Click the event name to copy name to the clipboard.
- Clone Events: Create a duplicate of the event.
- Delete: Delete the event.
- Preview: Preview the patterns added to the event.
- Clicking anywhere else will reopen the Event-Pattern mapper window.
Create the Category
You can create a category to organize events.
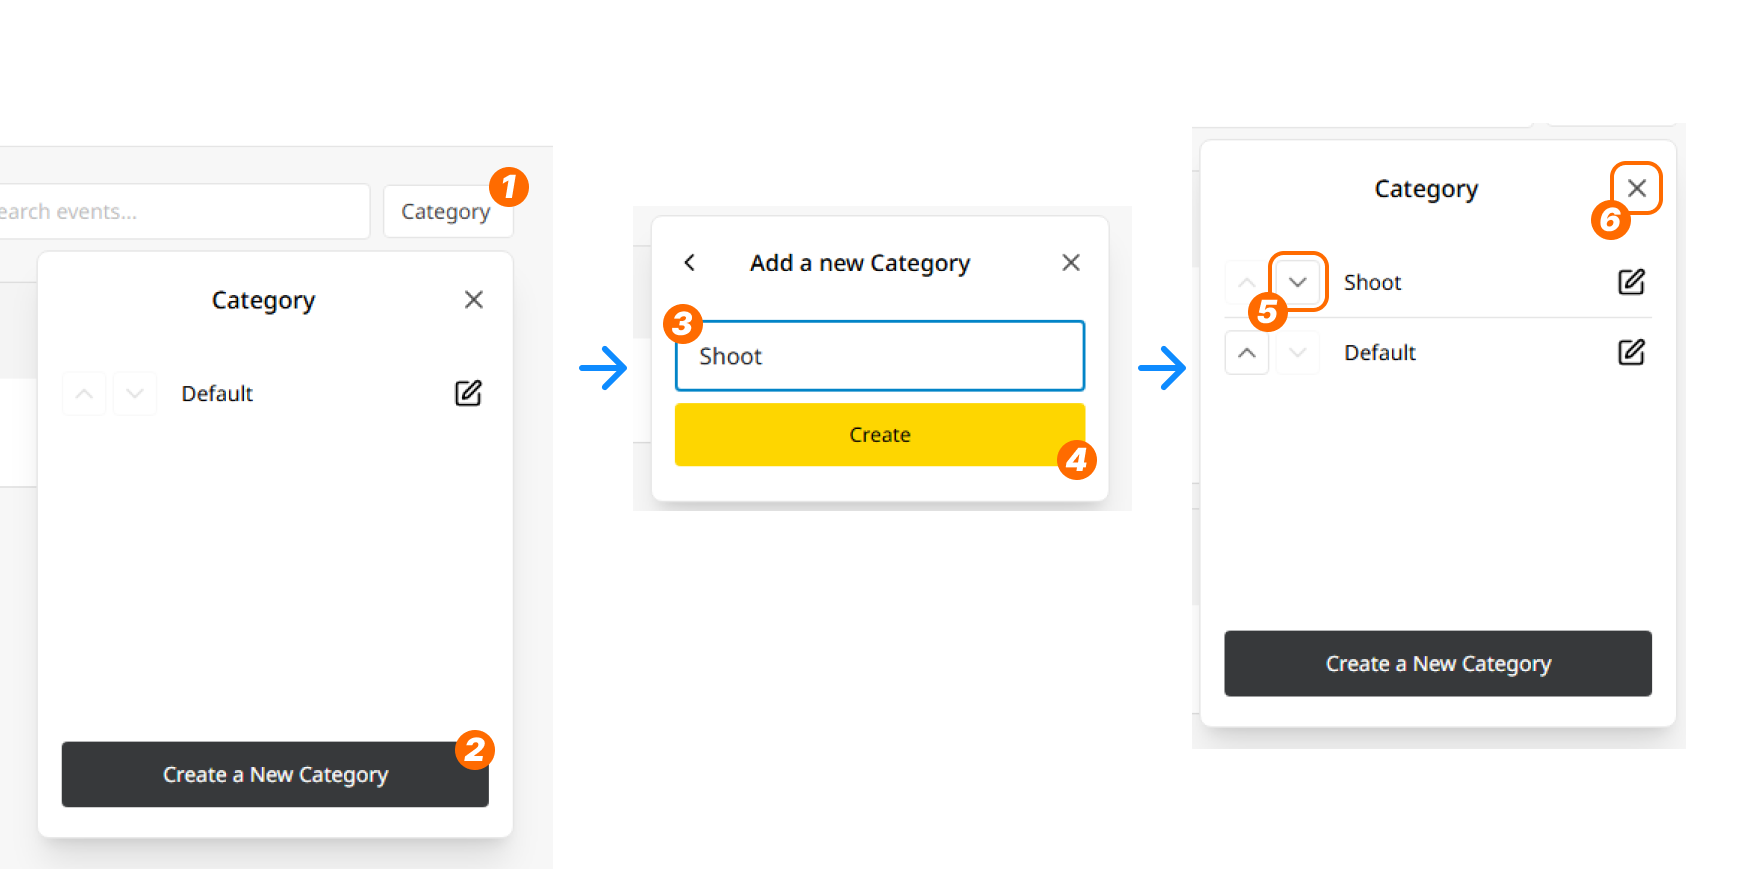
- Press "Category", then the pop-up window will appear.
- Press "Create a New Category".
- Name the category. Let's name it
Shoot. - Press "Create". Then the new category named
Shootwill appear. - Press 'Down' icon to change the sequence.
- Press 'Close' icon to close the window.

We've just created a new category. It will be great to place shooting-related events in the Shoot category when necessary. For example, we can create an event called shoot_rifle_r for shooting with the right hand.
We've created a new app, added a new event within it, and imported a pattern from the library into the event.
Next, we'll learn how to import patterns directly from the Designer instead of the Library and manage the imported patterns within the event.