Design the Layer
In this page, we'll go ahead and make our first layer in the effect and design the layer using various modes such as Dot, Path, Free Path, and Waveform. We'll also adjust the intensity, transition effect, and duration of the layer.
About the Layer
Layers are a part of the effect and contains characteristics of the haptic.
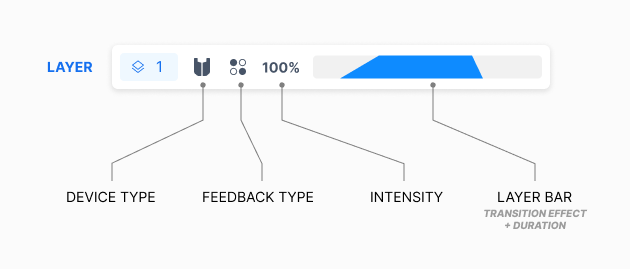
A layer has the following properties. We'll go over each of them, one by one.
- Device type
- Feedback type
- Intensity
- Transition effect
- Duration
Device type
Device type defines which haptic device is used by layer. A layer requires one device type.
- TactSuit
- TactVisor
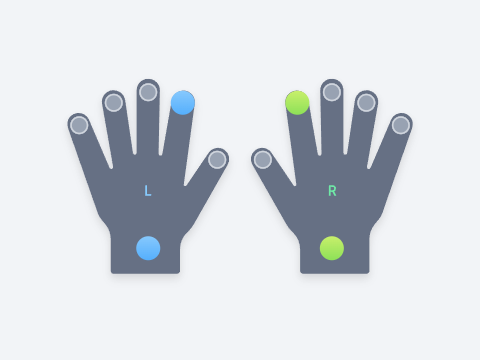
- TactGlove
- TactSleeve
- Tactosy for Hands
- Tactosy for Feet
For more information about our haptic devices, check out our store page.
Feedback type
Feedback type determines the expression method of the haptic.
- Dot
- Path
- Free Path
- Waveform(TactGlove Only)
Others
- Intensity: Determines how strong the haptic of the layer is.
- Transition Effect: Set the fade in, fade out effect.
- Duration: Determines the start, and end timing of the layer. (It also determines fade in/out effect timing if the transition effect is enabled.)
Our first layer
Create a layer
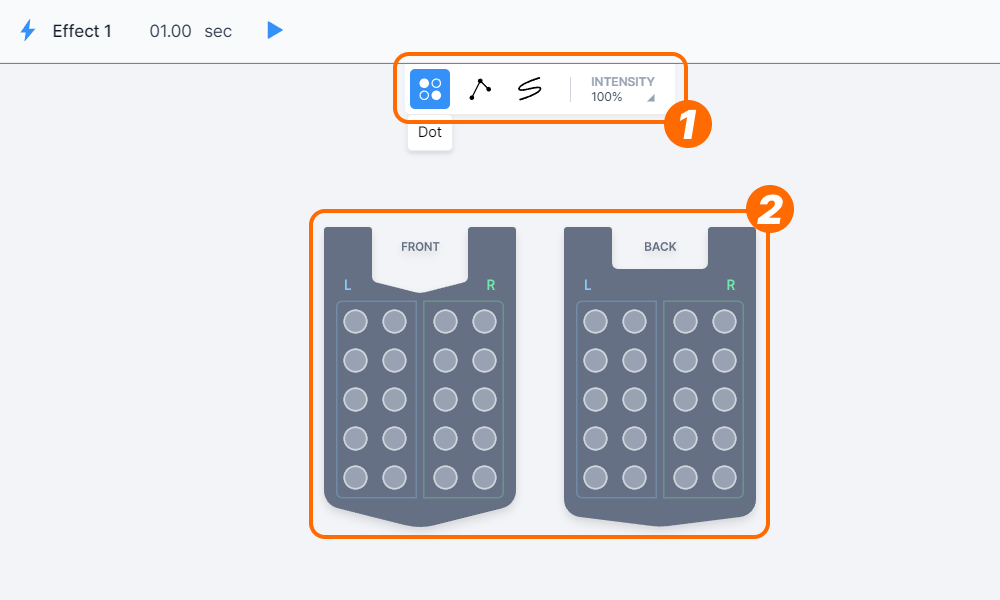
- Let's take a look at the Canvas in the center. At the top of the Canvas, there is a button to select the feedback type. In order from left to right, there are Dot, Path, and Free Path(and Waveform if you select TactGlove). First, let's select Dot button on the far left.
- Select one of the dots in the TactSuit below. Once you select it, a new layer will be created.
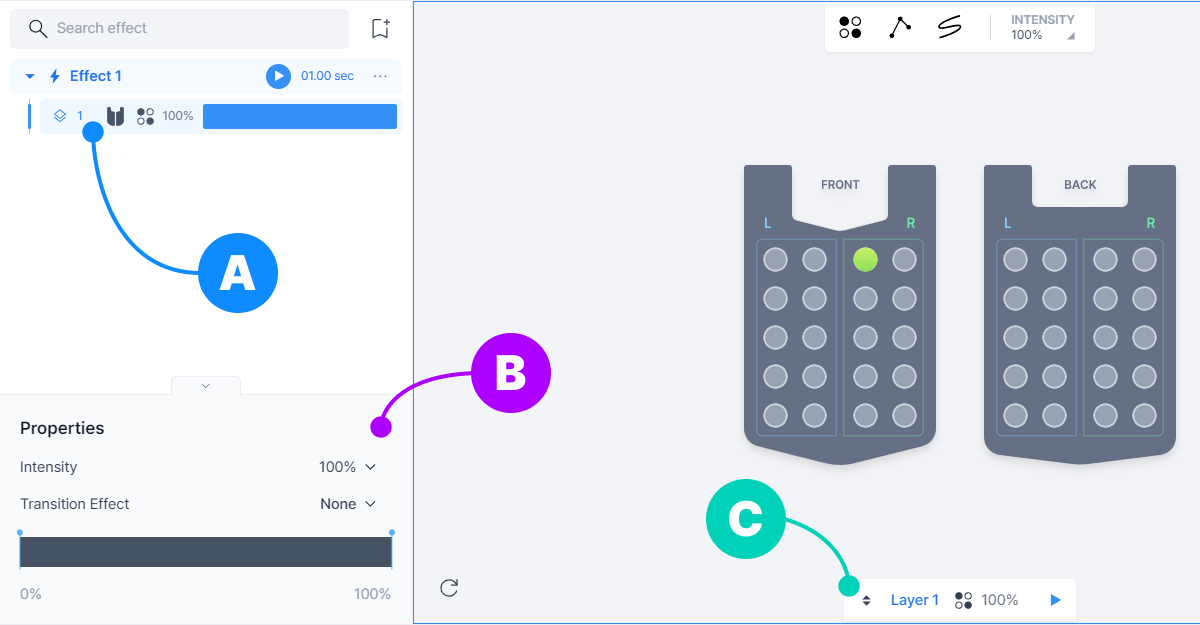
Similar to when we add our first effect, there are some changes right after we add the layer.
- (A) There is a new layer under "Effect 1". We can recognize the device type, feedback type, intensity, and layer bar at a glance.
- (B) "Properties" panel is right below. We can modify the intensity, transition effect, and timing graph of the layer.
- (C) In Canvas, there is a simple info of the layer which we are modifying.
There are no buttons and it says "Effect not selected".
Select "Effect 1" on the Effect/Layer panel on the left.

There is nothing in Canvas.
Check out the Menu bar and select any device.

Let's preview
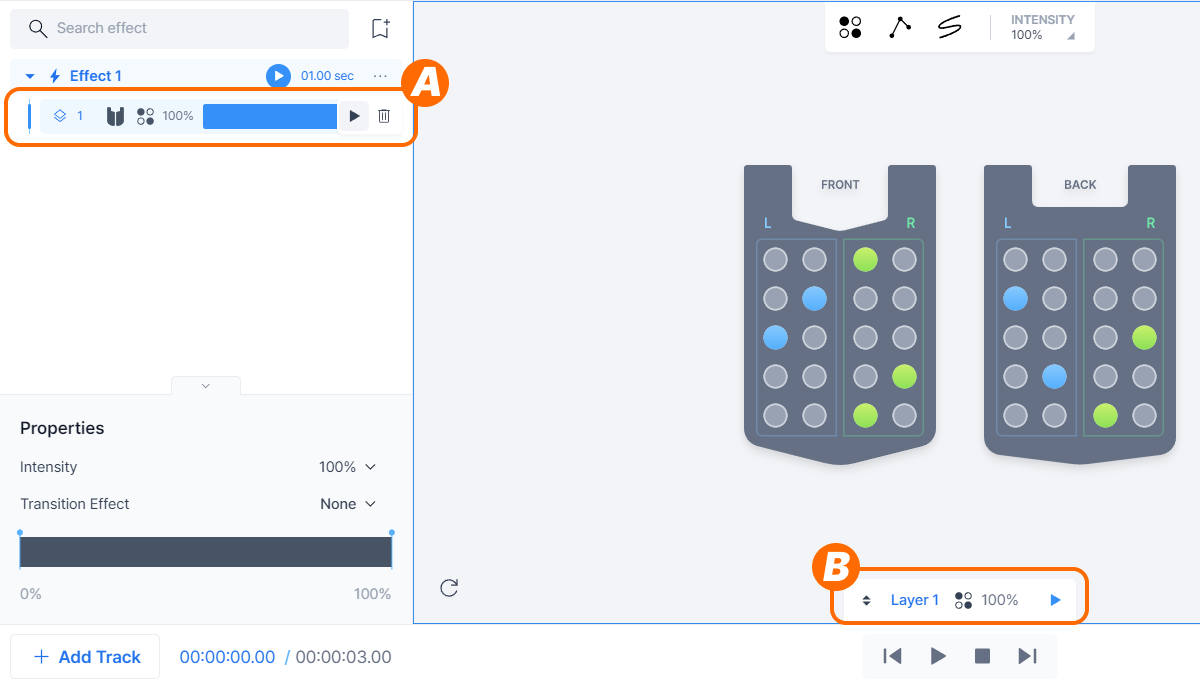
There are two methods to preview the layer.
- (A) When you hover your cursor over the layer in the Effect/Layer Panel, a widget with play/delete buttons will appear. Press play.
- (B) There is an info of the layer currently being edited in the Canvas. Press play.
Design the layer for each feedback type
Similar to the other design tools, there is also an undo/redo feature (Ctrl + Z, Ctrl + Shift + Z) and a copy/paste feature (Ctrl + C, Ctrl + V).
Dot
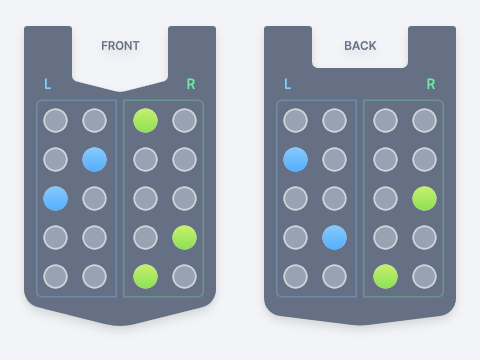
Dot is the simplest feedback type. You can create a discrete haptic by simply toggling each feedback point on and off.
Path
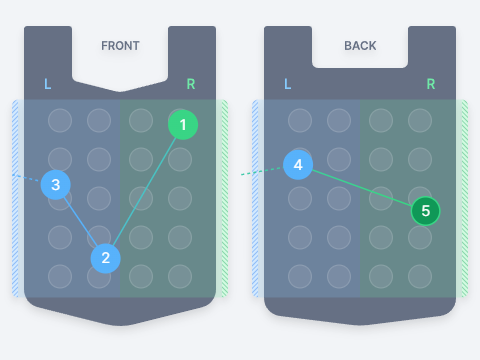
Path allows you to define the anchors of the path in which the haptic point will move along. You can create continuous haptic feedback by defining each point along the designated path.
The path consists of one or more straight lines connected to each other. Click anywhere in the device area to create an anchor point, just like the pen tool in other design tools.
Free Path
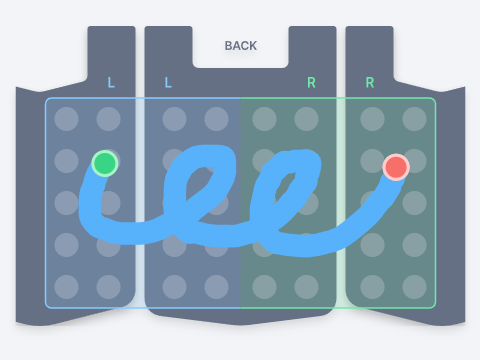
Free Path works similarly to Path, but it allows you to draw a line more freely.
Simply drag and draw the shape you want. It is similar to the pencil tool in other design tools.
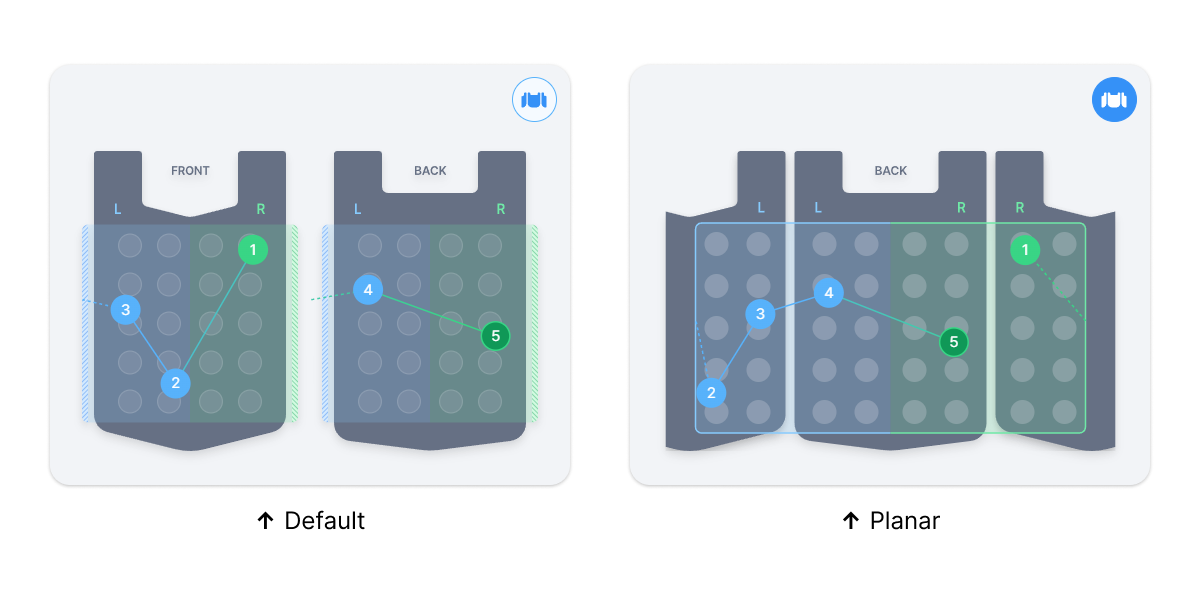
When editing the Path or Free Path layer of the TactSuit, you can choose the appearance of the TactSuit between Default and Planar. Choose according to your preference.

Waveform
In Waveform, you can generate haptic feedback based on predefined wave form patterns such as constant, increase, or decrease. This type is only available for the TactGlove.
It is similar to Dot, but it has extra properties. We'll talk about it later.
We have now designed and created some layers. Next, we'll adjust the properties of the layer.